E-mobility

In the increasingly competitive world of e-mobility, efficient production of high quality components is critical. KEYENCE sensors are playing a critical role in helping suppliers and manufacturers achieve their goals for process improvement and component reliability. Browse some examples of e-mobility solutions below or request to speak with a local specialist.
Identify edge bead inline to reduce waste by monitoring the edge shape with laser profilers. The LJ-X8000 can produce a stable profile (even on wet, black surfaces) to provide real-time coating process feedback.
2D/3D Laser Profiler
LJ-X8000 series


Measure electrode coating thickness inline using opposing non-contact sensors. The CL-3000 can monitor thickness of wet coating, which minimizes the time between application and inspection to reduce waste. Simultaneously measure up to three positions across the web using a single controller to confirm thickness and uniformity.
Confocal Displacement Sensor
CL-3000 series


Detect edge waviness immediately after foil slitting using high-speed displacement sensors. The CL-3000 can capture the shape of the end face during motion thanks its high speed sampling and stability.
Confocal Displacement Sensor
CL-3000 series


By monitoring the gap between calendar rolls, it's possible to maintain tight control over sheet thickness. The LS-9000 Series can measure gaps as small as 10μm.
High-speed optical micrometer
LS-9000 series


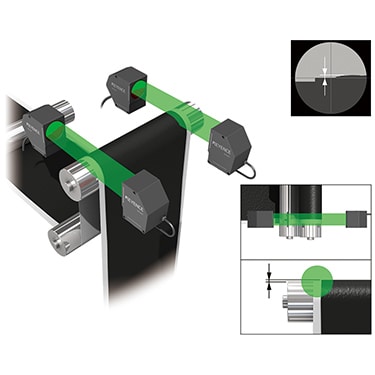
The TM-3000 projects the 2D shape of a web's edge to measure thickness with high accuracy. By capturing the surrounding area, the TM can account for web decentering or roll runout to correctly measure the material thickness regardless of surface condition.
High-speed 2D Optical Micrometer
TM-3000 series

Detect chipping or dents in laser welded beads using 3D laser profilers. The measurement is unaffected by color or gloss of the weld, making inspection results stable through glare or bead shape variation.
2D/3D Laser Profiler
LJ-X8000 series


Measure expansion during charge/discharge testing to understand shape changes during abnormalities that could impact battery safety.
2D/3D Laser Profiler
LJ-X8000 series

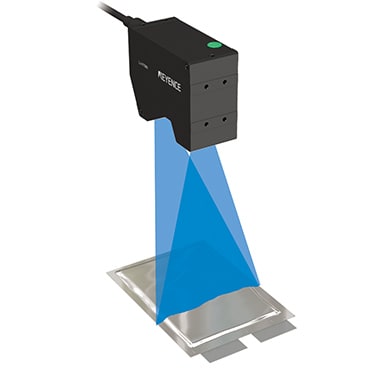
Detect burrs arising on terminals after electrode slitting. With ultra-high-resolution 3200 points/profile measurement, the LJ-X8000 Series produces stable detection even for minute burrs.
2D/3D Laser Profiler
LJ-X8000 series

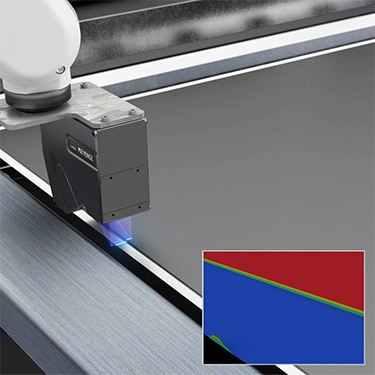
Inspect for lamination misalignment after winding. With a minimum X-resolution of 2.5 μm, the LJ-X8000 Series accurately measures the profile of each electrode.
2D/3D Laser Profiler
LJ-X8000 series


Provide feedback about disconnected locations in electrodes before lamination. Accurately acquire the profile of electrode terminals to perform high-accuracy inspection of edge locations.
2D/3D Laser Profiler
LJ-X8000 series


Inline thickness measurement of electrical steel sheets is simple using non-contact displacement sensors. The built in alignment tools and dedicated jigs make the CL-3000 a reliable solution for accurate thickness measurement of sheets, even during fluttering.
Confocal Displacement Sensor
CL-3000 series


Confirm the number of laminates in a stack by measuring the overall thickness. The CL-3000 can catch if a motor core has more than the intended number of laminations layers to mitigate the risk of motor performance issues later.
Confocal Displacement Sensor
CL-3000 series


By using two TM-3000 Series sensors, you can check the outer diameter and cylindricity of lamination stacks with larger diameters.
High-speed 2D Optical Micrometer
TM-3000 series


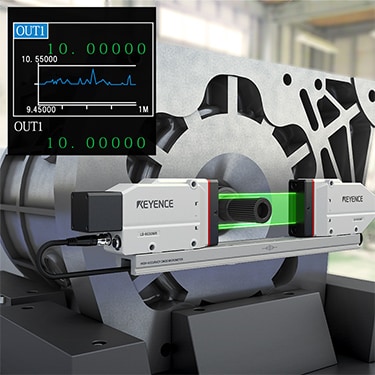
Measure core eccentricity without touching the part. The high-speed sampling of the LS-9000 enables accurate measurement of the core position and diameter during rotation and eliminates operator error.
High-speed optical micrometer
LS-9000 series

After assembling the flat wire, inspect whether the insulating paper is in the correct position. The LJ-X8000 series can measure with high accuracy even when various materials such as metal, rectangular wire, and paper are mixed.
2D/3D Laser Profiler
LJ-X8000 series


Inspect motor height after powder welding using the LJ-X8000 Series. The 3D laser profiler provides reliable 100% inspection with its high speed and measurement stability.
2D/3D Laser Profiler
LJ-X8000 series


Confirming seal shape helps to prevent oil leakage during the lifespan of the motor. The LJ-X8000 Series can inspect the shape using height data, resulting in more reliable inspection than a general image sensor could provide.
2D/3D Laser Profiler
LJ-X8000 series


Detect fine chips that can occur when inserting magnets into rotors using 3D inspection. The LJ-X8000 Series provides high resolution 3D images, making it possible to reliably inspect for tiny chips that are difficult to detect from a 2D image.
2D/3D Laser Profiler
LJ-X8000 series


Check parallelism and float during ECU assembly to prevent joint contact failures or component detachment. The CL-3000 Series can accurately measure targets of any colour without adjusting settings, making this inspection very stable.
Confocal Displacement Sensor
CL-3000 series

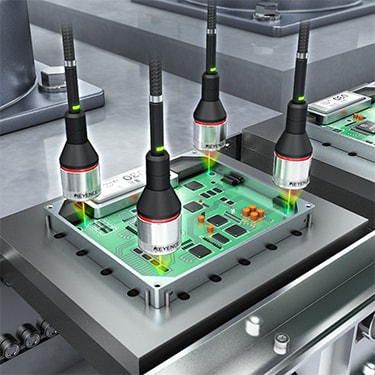
Proper installation of the O-ring is critical for preventing oil leakage that could damage the ECU. Using the LJ-X8000 Series, you can check for accurate assembly and record measured values inline.
2D/3D Laser Profiler
LJ-X8000 series


Ensure the quality of leads prior to installation in harsh environments by inspecting 100% using laser displacement sensors. The high speed sensors are simple to use and can provide confidence that each part meets the strict requirements of automotive components.
Confocal Displacement Sensor
CL-3000 series

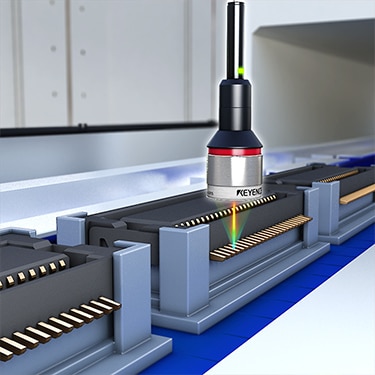
Inspect for substrate warpage without stopping the line using a 2D laser profiler. The LJ-X Series can check for gaps between the carrier and the substrate without having to stop and scan the part with a 1D sensor, which reduces inspection time.
2D/3D Laser Profiler
LJ-X8000 series


Stably measure the liquid level of glossy flow solder using the CL-3000. Solder bath can be difficult to measure due to its surface characteristics, but the confocal CL Series can handle the variation in shine and angle, supporting accurate level measurements.
Confocal Displacement Sensor
CL-3000 series

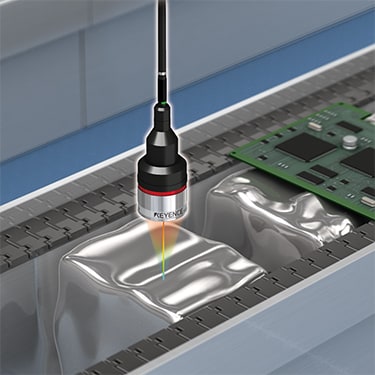
Reliably inspect connector height and detect bent pins inline. Laser profilers capture a high resolution 3D image of the connector shape, providing an accurate, non-contact method for sorting at high speed.
2D/3D Laser Profiler
LJ-X8000 series


Check for volume and even distribution of solder paste on PCB inline. Multiple areas can be inspected simultaneously from the 3D image.
2D/3D Laser Profiler
LJ-X8000 series


Measure the position and projection of connector terminals simultaneously. Conventionally, two measurement steps were required using an image processing system and a contact sensor. The LJ-X8000 Series can perform both inspections simultaneously. This achieves cost reduction by reducing the amount of installed equipment.
2D/3D Laser Profiler
LJ-X8000 series


Measure the flatness of the terminals of power modules. The target is detected by its surface and the flatness is measured based on the reference plane calculated with the least squares fitting method. The errors caused by the tilted positions of targets can be cancelled, which ensures accurate inspection.
2D/3D Laser Profiler
LJ-X8000 series

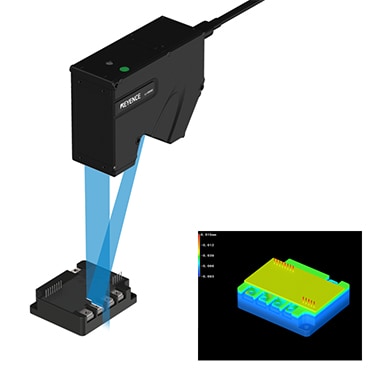
Conventionally, a vision sensor was used for OK/NG judgement based on the area. Since the LJ-X8000 Series can measure the volume and position of paste application, it can reduce material costs and support higher component densities.
2D/3D Laser Profiler
LJ-X8000 series


![Automated Measurement and Inspection Examples [Motors]](/img/asset/AS_118229_S.jpg)
