Measurement of Wear and Problems of Bearings
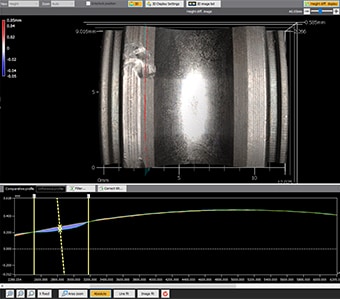
Bearing quality is evaluated based on smooth movement and durability. Smooth movement directly affects power-saving performance and movement accuracy, while durability directly affects the service life. As the materials, structures, lubrication methods, and sealing properties of bearings are becoming more advanced, so has maintenance-free bearings. However, as long as bearings contain sliding parts, no structure can avoid problems caused by wear or damage.
This section introduces bearing problems, methods of measuring bearing accuracy, problems with these methods, and a solution to these problems.
- Bearings
- Bearing Types and Loads
- Bearing Problems
- Problems in Conventional Bearing Measurement
- Solution to Problems in Bearing Measurement
- Summary: Comprehensive Improvement of Problems and Higher Efficiency for Bearing Shape Measurement
Bearings
A bearing supports a rotating shaft in such a way as to prevent rotational deflection. Bearing are used in a wide range of fields including automobiles, bicycles, home appliances, and airplanes. Therefore, it is necessary that they are weather-resistant to withstand use at high and low temperatures and also durable to withstand high loads and high-speed rotation.
Bearing Types and Loads
The majority of bearing problems are wear and scratches that occur on high-friction surfaces between the balls, rollers, shafts, and the parts that support them. Causes include external shocks and assembly failures, as well as deterioration resulting from use. Countermeasures to these problems vary depending on the bearing structure and the load which is applied to the bearing.
Types of bearings
There are two major bearing types: bearings with rolling elements such as roller bearings and ball bearings, and slide bearings that use a lubricant in place of the rolling elements.
- Ball bearings, roller bearings, and needle roller bearings:
- These bearings support a shaft with balls or cylindrical rollers. Those using balls are called ball bearings. Those using rollers are called roller bearings or needle roller bearings. Roller bearings and needle roller bearings have a high load-bearing capacity and can be thinner than ball bearings.
- Slide bearings:
- Slide bearings are also known as plain bearings. They are also sometimes called metal bearings because the shaft directly contacts the bearing surface. Slide bearings contain a lubricant to reduce friction. The lubricant film impedes rotation of the shaft at the start of rotation. However, once rotation has stabilised, resistance is reduced because there is no mechanical contact. As there is no contact surface while the shaft is rotating, this type of bearing rotates quietly and has the ability to withstand high-speed rotation and shock loads.
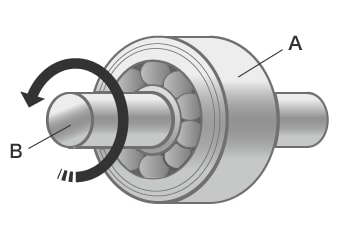
- A
- Ball bearing
- B
- Shaft
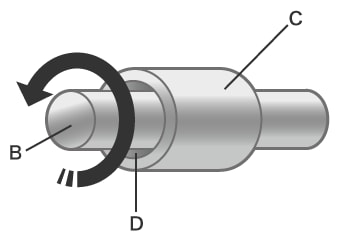
- B
- Shaft
- C
- Slide bearing
- D
- Lubricant
Bearing loads
Forces applied to bearings are categorised into radial, axial, and moment loads.
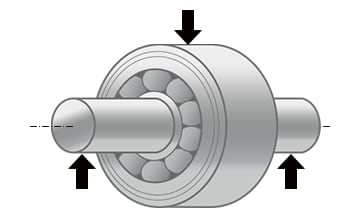
- Radial load:
- A radial load is applied in the direction perpendicular to the centreline of the bearing (the circumferential direction of the rotating body).
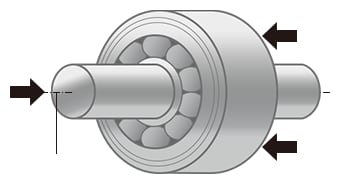
- Axial load:
- The axial load is also called a thrust load; this load is applied in the direction parallel to the centreline of the bearing (the axial direction of the rotating body).
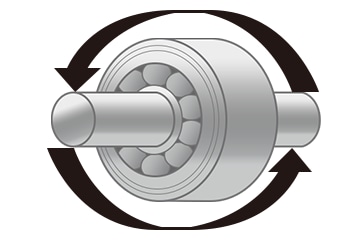
- Moment load:
- This load is generated as a result of eccentricity in the bearing or shaft. When a bearing is subject to a moment load, its service life will be drastically reduced.
Bearing Problems
Typical bearing problems include wear, flaking, galling, and peeling. Other problems include indentations caused by impact when a bearing is installed, dropped, or overloaded; smearing caused by insufficient clearance or overload; and electrolytic corrosion caused by poor lubrication or installation failure. The causes of these problems can be identified by measuring and observing the surfaces.
This section introduces the damage conditions, causes, and countermeasures to the typical problems of wear, flaking, galling, and peeling.
Wear
Wear can be caused by many different factors and can manifest in a wide range of bearing phenomena.
- Damage conditions:
- The surface becomes worn, resulting in changing dimensions. The surface is rough or scratched.
- Causes:
-
- A solid foreign material entered the lubricant
- There's insufficient lubrication
- There is insufficient clearance between the engaged surfaces.
- Countermeasures:
-
- Filter the lubricant or improve the lubricant quality or lubrication method.
- Improve the sealing performance.
- Increase the interference.
Flaking
Flaking is a type of peeling. This problem occurs on raceway surfaces or rolling surfaces when the bearing has reached the end of its service life. However, when this problem occurs at an early stage, it is necessary to immediately identify the cause and enact some kind of countermeasure.
- Damage conditions:
- Scaly pieces peel off from the entire circumference of the raceway. This leaves behind irregularities on the raceway surface at the ball pitch.
- Causes:
-
- Excessive axial load caused by assembly failure or swelling of the shaft.
- A foreign material entered the bearing or corrosion has occurred.
- Countermeasures:
-
- Review the assembly accuracy.
- Optimise the load. Increase the viscosity of the lubricant and improve the lubrication method.
- Take steps to prevent corrosion when bearings are not used for a prolonged period.
Galling
Galling is a phenomenon that causes localised adhesion of surfaces as a result of heating. This problem occurs in the axial direction.
- Damage conditions:
- Damage results in seizure of the raceway and rolling surfaces.
- Causes:
-
- Incorrect handling during bearing installation or removal.
- Insufficient lubricant or insufficient lubrication on contact surfaces caused by excessive axial loads.
- Excessive preload. Slipping of the rolling elements.
- Countermeasures:
-
- Improve the installation and removal methods.
- Decrease the load and improve the lubricant and lubrication method.
- Improve the sealing performance
Peeling
The raceway surfaces become dulled as a result of friction. This problem most often occurs in needle roller bearing. Peeling can also progress to flaking.
- Damage conditions:
- The surface becomes peeled over a wide area to a depth of a few μm to 10 μm.
- Causes:
-
- Unsuitable lubricant.
- Foreign material in the lubricant.
- Insufficient lubrication.
- Roughness on the surfaces of mating parts.
- Countermeasures:
-
- Select a suitable lubricant.
- Filter the lubricant. Improve part roughness.
Problems in Conventional Bearing Measurement
In most cases, bearing problems occur in the outer and inner raceways, balls, and rollers. Therefore, the occurrence of wear, flaking, galling, peeling, and other problems can be detected by measuring these parts.
Conventional bearing measurement uses profile measurement systems. However, because bearings have complex shapes, this involves the following measurement problems.
Problems in bearing measurement using a profile measurement system
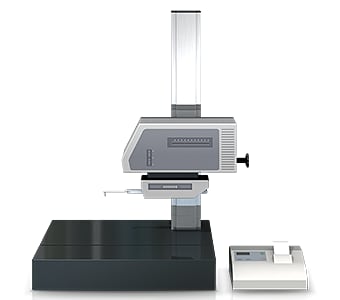
A profile measurement system measures and records the profile of a target by tracing its surface with a stylus. In recent years, profile measurement systems have been developed to use a laser instead of a stylus to measure complex shapes by tracing the profile in a non-contact manner. Some models are even able to perform measurement of both the top and bottom surfaces.
However, with a profile measurement system, it is necessary to acquire accurate measurement lines for the bearing problem that will be measured.
This involves the following problems.
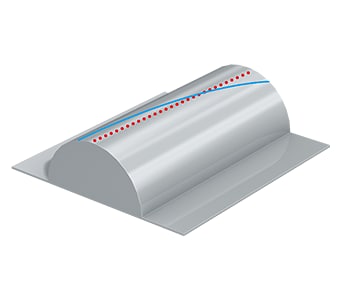
- Measurement work requires much time, including time for fastening the sample to a jig and levelling it. Additionally, knowledge and skills related to using a profile measurement system are required in order to level a target accurately.
- The stylus of a profile measurement system moves up and down in an arc centred on the fulcrum of the stylus arm, and the tip of the stylus also moves in the X-axis direction. This produces error in the X-axis data.
- Tracing the desired line with the stylus is extremely difficult work, and even slight displacement of the stylus produces error in the measured values.
- It is also difficult to increase the number of targets because of the need to pinpoint specific locations for measurement.
- Only part of a target can be measured, and evaluation of the entire surface is not possible.
Problems in measurement using a coordinate measuring machine
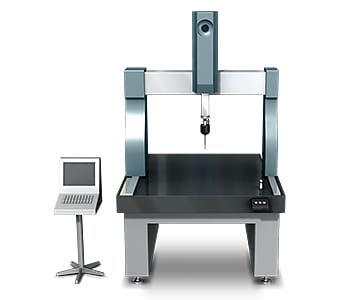
When the area to be measured is small, for example 1 mm2, it is extremely difficult to measure the shape accurately or create a virtual surface with the probe. It is also difficult to identify the accurate 3D shape when measuring a small area due to the small number of measurement points. Much work is also involved with related tasks such as tabulating the measurement data and comparing the results with the drawings.
Solution to Problems in Bearing Measurement
Profile measurement systems involve problems such as the fact that it is impossible to identify the entire shape because measurement of three-dimensional targets and areas is performed by means of point or line contact, and the low reliability of the measurement values. To resolve these measurement problems, KEYENCE has developed the VR-Series 3D Optical Profilometer.
The VR Series accurately captures the 3D shape of the entire target surface without contacting the target. This tool allows user to accurately measure an entire surface in as little as 1 second. The system automatically sets the measurement range and conditions, ensuring accurate quantitative measurements without variations between users. This section introduces some specific advantages of the VR Series.
Advantage 1: The entire 3D shape surface is measured.
Measurement can be performed simply by placing the target on the stage and pressing a button. Strict positioning or other preparation is not required. This makes it possible to perform highly accurate measurement by operators who do not have knowledge or experience related to measuring instruments.
Unlike traditional profile measurement systems, the VR-Series extracts the characteristics of the target on the stage and automatically corrects its position. This makes it possible for even an operator unfamiliar with measurement to easily and instantaneously perform measurement, without the need to assign a specialised operator to measurement work. The VR-Series can also measure a wide area of up to 300 mm × 150 mm, making it possible to simultaneously measure multiple targets on the stage.
With the VR Series, even a target with a complex shape such as a bearing can be measured accurately simply by placing it on the stage and pressing a button.
Advantage 2: A wide variety of assist tools eliminate variation in measurement
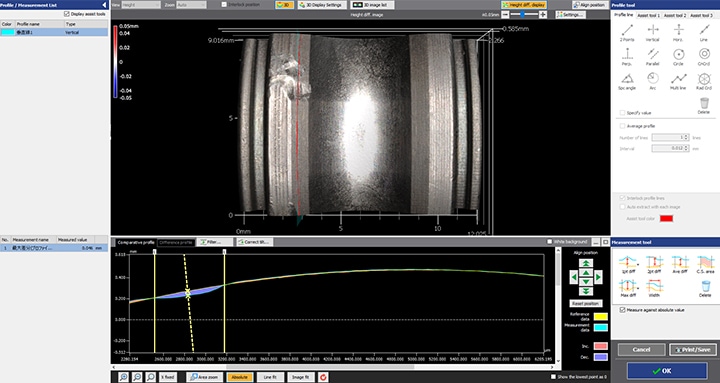
Perpendicular profile lines can be drawn accurately using tools on the PC screen at the desired locations in the scanned 3D shape data, eliminating variation in the measurement results.

The wide variety of assist tools allows simple setup of the desired measurement contents. For example, by using the vertical baseline tool, it is possible to easily and accurately decide the measurement line for the bearing outer diameter.


In addition to easy configuration, the assist tools allow the system to be operated easily even by novices, making it possible even for operators who are unfamiliar with measurement to measure shapes accurately in as little as one second. As a result, the number of samples can easily be increased not only for prototypes and trials, but also for measurement and inspection of products.
Summary: Comprehensive Improvement of Problems and Higher Efficiency for Bearing Shape Measurement
The VR Series can measure 3D target shapes accurately and instantaneously by high-speed 3D scanning without contacting the target. Even difficult measurements, such as wear measurement of balls, rollers, and raceway surfaces, can be completed in as little as one second. The VR Series solves all the problems involved with conventional measuring instruments.
- Because the entire surface can be captured by non-contact means, it is possible to measure cross-sections where a stylus cannot reach. Even small bearings can be measured easily and accurately.
- The wide variety of assist tools eliminate variation resulting from human factors, making true quantitative measurement possible.
- Without the need for positioning or other preparation, measurement can be done simply by placing the target on the stage and pressing a button. This eliminates the need to assign a specialised operator for measurement work.
- 3D shapes can be measured easily at high speeds with high accuracy. This makes it possible to measure a large number of targets in a short time, helping to improve quality.
This system also allows comparisons with past 3D shape data and CAD data, as well as easy data analysis such as distribution within tolerances. It can be used effectively for a wide range of purposes including product development, manufacturing trend analysis, and sampling inspections.


