A Method for Highly Accurate and Instantaneous Measurement of Flatness

The degree of flatness of a target surface is extremely important in manufacturing industrial products and guaranteeing quality. The allowable range of surface irregularities is specified by the flatness, which needs to be controlled with tolerances. For this purpose, accurate and quantitative measurement is essential. Without it, shape defects may be overlooked, which not only makes it difficult to maintain quality, but can also affect the following processes and lower the yield rates.
This page explains basic knowledge of flatness, and problems in conventional flatness measurement. It highlights solutions to the various problems that users run into presently, offering solutions dramatically.
- Flatness
- Parallelism: Also Important for Waviness and Twisting
- Problems in Conventional Flatness Measurement
- Solution to Problems in Flatness Measurement
- Summary: Dramatic Improvement in Ease of Use and Efficiency for Flatness Measurement
Flatness
Flatness is defined as the amount of difference between a surface shape and a geometrically correct plane. The following figure shows an image of a target surface.
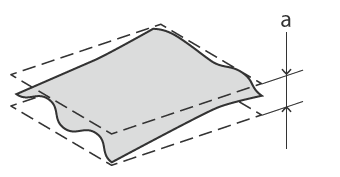
- a
- 0.1 mm or less
Supposing that the target surface lies between two perfectly flat and parallel planes, the distance between those planes is the flatness. In other words, when the tolerance specifies how flat the target surface should be, the most convex part and the most concave part must be within two parallel planes above and below the target surface that are separated by the specified distance.
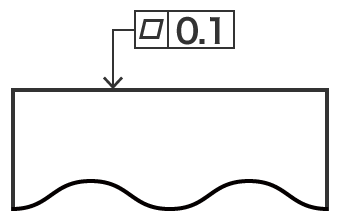
In this figure, the distance of 0.1 mm or less is defined as the tolerance. In drawings, flatness is specified using a symbol and a number as shown in the following figure.
Parallelism: Also Important for Waviness and Twisting
Flatness may exceed tolerances as a result of various factors. For example, when components are mounted onto a PCB, the PCB can become warped by heating during the reflow process. Sheet metal can undergo unintended warpage, strain, or surface irregularities due to residual stress caused by pressing (such as punching or drawing).
There may also be complex interaction of warpage, waviness, strain, twisting, and other deformation due to various factors such as thermal expansion and contraction, residual stress, and uneven material thickness. In short, objects do not always warp as they are expected to. In most cases, objects deform in three dimensions, resulting in deformation of sides that are supposed to be parallel. To control this deformation, parallelism is important.
Parallelism is a GD&T concept which specifies that two lines or planes are parallel to each other. The major difference between flatness and parallelism is the use of a datum (a reference plane or line).
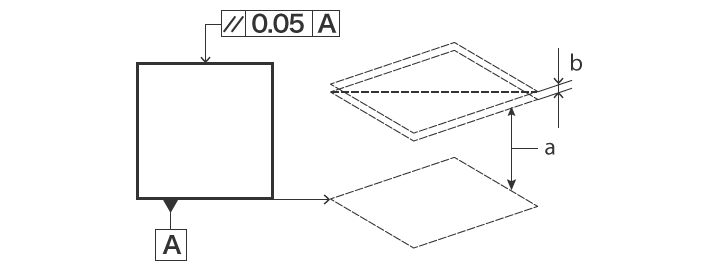
- a
- Parallel
- b
- 0.05 mm or less
The plane indicated by the instructional arrow in the figure must be parallel to datum plane A (a plane which is defined as flat even if there is waviness on the actual target) and must fall between two projected planes separated by no more than 0.05 mm in the direction of said instructional arrow.
For thin targets such as metal plates, plastic sheets and films, PCBs, and smartphone protective glass, variation in thickness may cause warpage, waviness, twisting, and strain, which may affect flatness and parallelism.
Problems in Conventional Flatness Measurement
In many cases, deformation occurs as a result of stresses such as heat or residual stress during material working. In sheet materials having uneven thickness, depending on the storage temperature or differences in the thermal expansion rate, flatness may exceed tolerances, resulting in defective shapes that affect the following processes and yield rate.
For example, when a PCB becomes warped or curved, it may cause lifting of the leads of mounted electronic components or other contact failures. When a wafer surface is warped or curved, this may affect the quality of chips fabricated on that wafer. To maintain stable product quality, it is important to correctly measure the surface shape of materials before forming, as well as the shape of products after forming, in order to determine whether the required flatness is being maintained.
Problems in flatness measurement using a coordinate measuring machine
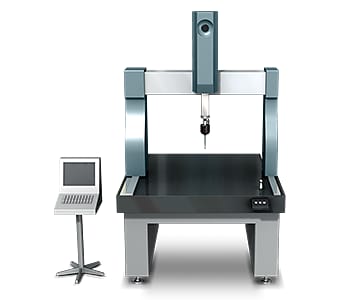
With ordinary measurement of flatness using a coordinate measuring machine, it is necessary to contact multiple points on the measurement target surface with the probe tip.
When the measurement area is large, measurement accuracy can be improved by increasing the number of measured points to collect more measurement data.
However, this involves the following problems.
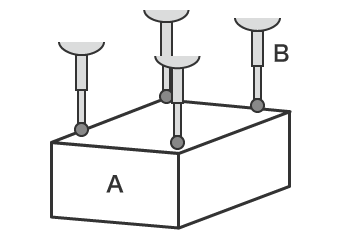
- a
- Target
- b
- Probe
- Because it is necessary to measure by contacting individual points, it is difficult to identify the shape of the entire target.
- To acquire more measurement values, it is necessary to measure more points, and this requires more time while still being unable to identify the detailed shape of the entire surface.
Solution to Problems in Flatness Measurement
Commonly used coordinate measuring machines are time consuming because they require multiple contact-based measurements on three-dimensional targets and areas. This measurement method also lacks reliability because of variation introduced by different operators, as well as difficulty creating usable data from point measurements.
To resolve these measurement problems, KEYENCE has developed the 3D Optical Profilometer VR Series.
The VR Series accurately captures the 3D shape of the entire target surface using non-contact measurement. A 3D scan of the target can be completed in as little as one second, producing high accuracy measurement of the surface shape. This section introduces some specific advantages of the VR Series.
Advantage 1: Complete measurement in as little as one second. The 3D shape of the entire target surface can be captured accurately with a single measurement.
The VR Series acquires surface data (800,000 points) for the 3D target shape in as little as one second, dramatically reducing the time required for measuring large numbers of points. It instantaneously and accurately measures the maximum and minimum irregularities on the entire target surface, enabling quick evaluation of flatness based on the preset tolerance.
The VR Series can also measure profiles at specific locations. Even after measurement, profiles of different parts can be acquired from the 3D scan data without scanning the target again.
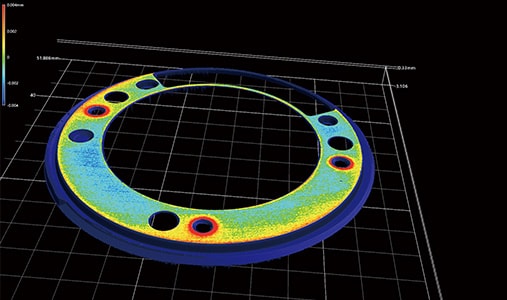
Advantage 2: Capable of quantitative flatness measurement with simple setup and operation.
3D shape measurement can be easily performed with a simple click of a button. Strict levelling and positioning are not required because of the ability to use automatic position adjustment based on target feature data. This series also includes the industry’s first Smart Measurement function that automatically configures the measurement range and moves the stage according to the target size. This eliminates the work that was required to set the measurement length and Z-range.
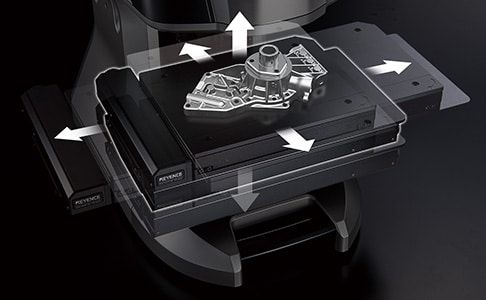
The wide variety of assist tools allows the setup required for flatness and parallelism measurements to be completed easily.
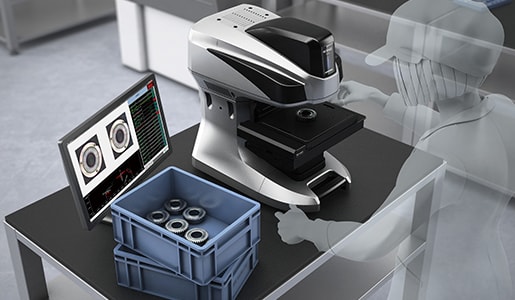
In addition to easy configuration, the assist tools make it possible for anyone to easily operate the system, requiring no specialised knowledge or skills. This makes it possible even for operators who are unfamiliar with measurement to measure flatness accurately in as little as one second. As a result, the number of samples can easily be increased not only for prototypes and trials, but also for measurement and inspection of products during commercial production.


Summary: Dramatic Improvement in Ease of Use and Efficiency for Flatness Measurement
The VR Series can instantaneously and accurately measure the 3D shape of the entire target surface, including warpage, waviness, twisting, and strain, by high-speed 3D scanning without contacting the target. This enables quick measurement of flatness.
- Because the entire surface is measured, it is possible to identify all locations on the target where flatness exceeds the tolerance, and to perform profile measurement at any desired location.
- Non-contact, high accuracy shape measurement is possible even for soft targets such as rubber and flexible plastic.
- No positioning is required. Just place the target on the stage and press a button to complete measurement.
- The 3D shape can be displayed in a colour map. Being able to share data that is visually easy to understand allows smooth coordination and countermeasures to be carried out.
- Multiple sets of measurement data can be easily and quantitatively compared and analysed.
This allows parameters such as flatness tolerance to be configured for multiple sets of measurement data at the same time. Identification of OK/NG products and data sharing are possible, allowing rapid analysis of NG products. The VR Series can deliver dramatic improvements in work efficiency for measurement, defect analysis, and preventative maintenance.


