Technical Cleanliness Inspection and Analysis of Automotive Components in Compliance with Industrial Standards
Foreign particles and residue (minute particles)—which are known as contamination—adhering to automotive component materials and other parts, can reduce the strength and safety of products. Particularly in the automotive and aerospace industries, contamination can cause engines and other components to break, which has a direct impact on human lives, so great importance is placed on inspecting and analysing contamination and ensuring cleanliness.
This section introduces technical cleanliness inspection methods based on industrial standards such as ISO and VDA and the latest examples of solving problems using a 4K Digital Microscope.
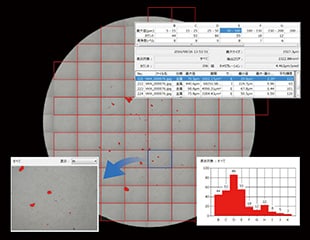
- Technical Cleanliness Inspection and Analysis in the Automotive Industry
- Solutions for Problems in Technical Cleanliness Inspection and Analysis
- New Common Practices for Technical Cleanliness Inspection and Analysis
Technical Cleanliness Inspection and Analysis in the Automotive Industry
All types of manufacturing sites have been paying attention to inspection and analysis of minute particles called contamination, foreign particles, or residue. In particular, the automotive, semiconductor, medicine, and food industries put importance on the cleanliness of products. This is because minute particles called contamination adversely affect products.
Particularly in the automotive industry, where slight contamination can cause important component failure or accidents and thereby endanger human lives, technical cleanliness inspection and analysis are becoming one of the items that are indispensable in quality management.
Effects of contamination on automotive components
Important automotive components include those used in engines. For example, pistons that repeatedly reciprocate with a clearance of only a few micrometres in an engine block cylinder liner are kept air-tight with engine oil. If a slight amount of metal contamination adheres to the side surface of a piston ring, repeated reciprocation will damage the inner wall of the cylinder liner, causing engine problems.
Also, with an increase in the number of automobiles equipped with high-capacity batteries, such as electric vehicles (EVs), hybrid electric vehicles (HEVs), and plug-in hybrid electric vehicles (PHEVs), the importance of paying attention to the metal contamination of components and materials, a problem that may cause lithium ion batteries to generate heat or fire, has also been increasing.
In addition to the complete cleaning of these components after manufacturing, cleanliness management through cleanliness inspection/cleanliness analysis in compliance with international industrial standards is also required.
International industrial standards ISO 16232 and VDA 19 for technical cleanliness inspection
As standards related to technical cleanliness inspection for automotive components, VDA 19 was issued in 2002 by the German Association of the Automotive Industry followed by ISO 16232 issued in 2007 as international standards. These standards have made measurement and composition analysis of foreign particles in compliance with quality requirements mandatory.
These standards define the management of technical cleanliness for oil- and water-related fluid parts such as tanks, pumps, valves, pipes, ducts, and casing—which are important parts for automotive components such as engines, turbochargers, and transmissions—as well as for lithium ion batteries and electronic/electrical components. Particle contaminants generated in the manufacturing processes of these automotive components are removed as much as possible in the cleaning process. Hence it is necessary to perform measurements and analyses to ensure that the technical cleanliness requirements defined in ISO 16232 and VDA 19 are satisfied.
Also, for oil, which is commonly used in automobiles, there is an international industrial standard related to technical cleanliness inspection in liquids. ISO 4406 defines the cleanliness code for (cumulatively) counting particles per millilitre of sample to summarise how contaminants are distributed in fluids.
Methods of technical cleanliness inspection and analysis
There are various methods of technical cleanliness inspection and analysis, and the following two methods are defined in ISO 16232 and VDA 19 as standard technical cleanliness analysis methods for the automotive industry.
- Gravimetric method (gravimetric inspection)
- This inspection is based on weight and is thus regarded as a relatively easy method, but analysis is conducted only using information related to the difference in weights.
With this inspection, it is impossible to investigate the size of each particle contaminant, the particle size distribution, and the properties of minute particles such as metals and fibres. That means you cannot obtain information useful for determining the cause of contamination or preventing its reoccurrence.
- Light scattering method (light scattering analysis)
- Optical microscopes are used for inspection and analysis. It is possible to determine not only the presence and volume of contamination but also the size of each particle, the particle size distribution, and the properties of particles (such as metals and fibres).
In the field of automobile manufacturing where contamination by minute particles may greatly affect the quality, performance, and safety of important safety components, technical cleanliness inspection using microscopes based on this light scattering method is most common.
Flow of extracting, measuring, and analysing contamination using the light scattering method
For technical cleanliness analysis of automotive components, inspection is not possible after assembly for components such as engines, which consist of complicated and important parts. Hence, the following procedure is used to conduct analyses for each component.
- Wash the part (product) with a method such as pressure rinsing to extract foreign particles.
- Filter the rinsed liquid through a membrane filter to trap foreign particles.
- Analyse the used membrane filter as a sample using a microscope.
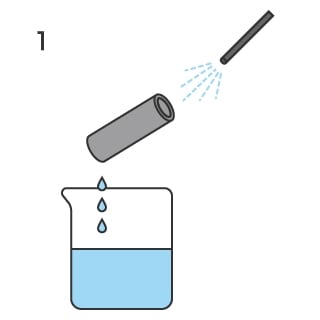
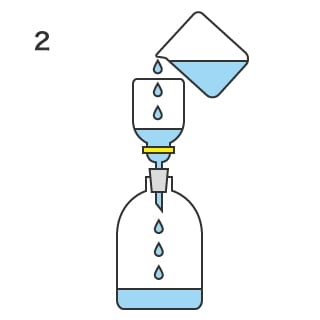
In measurement and analysis using microscopes, the number of particles (contaminant count), the particle sizes, and the type of foreign particles (such as metals and fibres) are measured, analysed, and compared under the same settings to prevent variation in measured values. Then, they are investigated in detail, including a determination of whether these items are risk factors in automotive components.
In ISO 16232 and VDA 19, various standards are defined, from methods to extract foreign particles to the minimum particle size for which analysis is required. For automatic measurement, they also define the pixel count and how to extract foreign particles. Furthermore, reports must be created in the format compliant with these standards.
Solutions for Problems in Technical Cleanliness Inspection and Analysis
In satisfying the requirements of international standards, technical cleanliness inspection and analysis using general microscopes involve various problems, such as the skill level of the operator and the quantification of the measurement results. Also, with automatic measurement using microscopes, conditions defined in industrial standards must be met, for example, in the settings of the lens/camera (magnification and resolution), the type of lighting (brightfield, darkfield, or backlighting), and the binarisation condition (threshold) for image processing software.
This section introduces efficiency improvements using KEYENCE’s latest 4K Digital Microscope.
In technical cleanliness inspection and analysis, you can quickly obtain detailed information of minute particles. You can also reduce the time and improve the efficiency for the processes from inspection and analysis to report creation in compliance with ISO 16232 and VDA 19. Furthermore, the obtained data is useful not only for technical cleanliness inspection to comply with the standards and ensure the quality but also for determining the cause of contamination with foreign particles, understanding trends, and improving manufacturing processes to prevent reoccurrences by saving and sharing the data.
Making technical cleanliness inspection and analysis compliant with ISO 16232 and VDA more accurate and easier
With the VHX Series 4K Digital Microscope
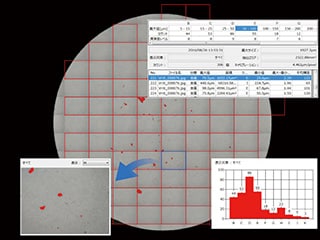
The VHX Series enables users to carry out technical cleanliness inspections compliant with the ISO 16232 and VDA 19 technical cleanliness standards for the automotive industry. By analysing a high-resolution image with a deep depth of field taken with the 4K Digital Microscope, even targets with uneven surfaces can be measured with high accuracy.
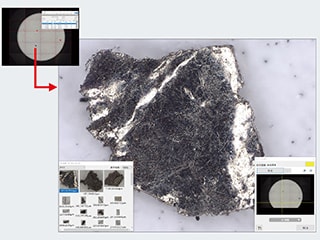
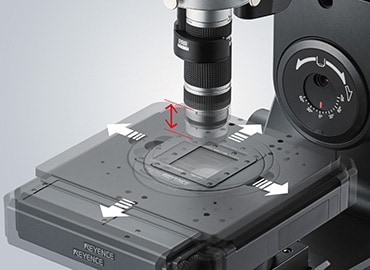
In Detailed Analysis mode, all you have to do is select a target contaminant on the image of the entire membrane filter. The stage moves automatically, enabling you to continue detailed observation at high magnification. Foreign particles can be identified easily and quickly. Furthermore, detailed observation and quantification are possible even for uneven shapes by using depth composition and 3D height measurement at the same time.
Enabling time reduction and quantification by way of automatic reproduction of conditions and automatic calibration
With the VHX Series 4K Digital Microscope
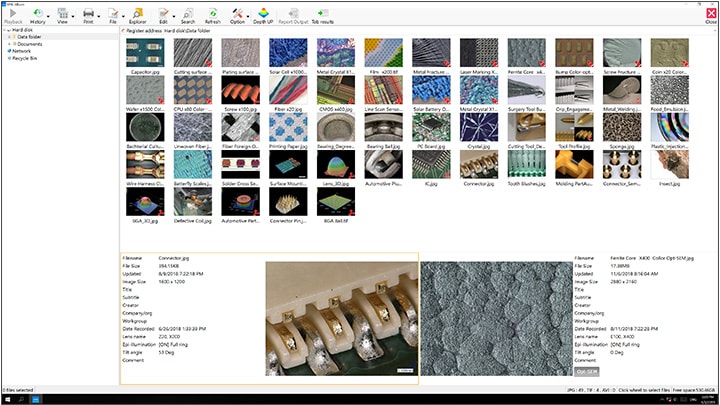
The microscope saves and reproduces past image capture conditions. By simply selecting an image from an album of captured images, its image capture settings (such as lens magnification, shutter speed, gain, light shift, edge enhancement, white balance, and light adjustment conditions) are loaded and reproduced automatically. This automatic reproduction of settings not only significantly reduces work hours but also enables different users to observe targets under the exact same conditions, thereby providing stable analysis results.
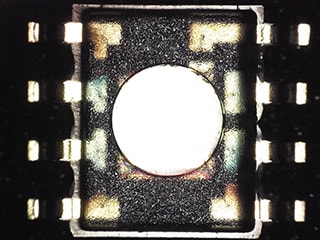
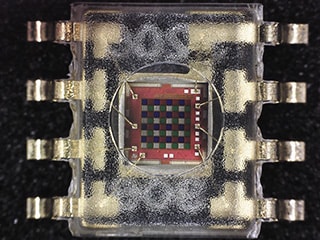
The high-resolution lenses and the motorised revolver enable a seamless zoom function that quickly switches lenses from 20x to 6000x magnification according to the size of contamination, eliminating the need for lens replacement. Additionally, the VHX Series automatically identifies the connected lens and can manage magnification data together with captured images.
Furthermore, the one-push calibration function automatically loads the required calibration values when the user simply performs a one-click operation. The ability to reproduce conditions used for extracting (binarising) contamination prevents variation in measured values.
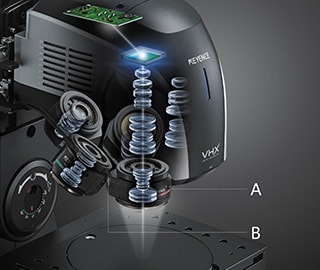
- A. High-resolution lens
- B. Motorised revolver
New Common Practices for Technical Cleanliness Inspection and Analysis
The VHX Series high-definition 4K Digital Microscope offers excellent efficiency and makes it possible to eliminate human errors and ensure accurate technical cleanliness inspection and analysis.
The high-definition 4K images generated by the cutting-edge optical image processing and automation techniques allow for detailed and clear observation of minute particles with simple operation, contributing to producing quick, sophisticated analysis results.
The captured or measured data can be easily output as a report with a fixed format using the report function. Sharing this data via an intranet server can be useful for not only quality assurance and ensuring conformity with industrial standards but also for identifying the causes of contamination when it occurs and for process improvement.
Equipped with many other advanced functions, the VHX Series can be a powerful partner for ensuring the reliability in quality with the cleanliness of products. For details, click the button shown below to download the catalogue. For inquiries, click the other button shown below to contact KEYENCE.


