Quantification of the Control and Evaluation of the Wear and Service Lives of Tools
The demand for more strength, accuracy, and weight reduction has resulted in an increased need for difficult-to-cut workpieces (materials), such as carbide alloys, hard brittle materials, and quenched steels.
Difficult-to-cut materials put a great load on cutting tools, so particular caution is necessary regarding worn or chipped blades of cutting tools.
KEYENCE’s 4K microscope dramatically improves the measurement efficiency of cutting tools and facilitates management and evaluation of tools.
- New Materials and the Evolution of Cutting Tools
- Importance of Tool Wear Inspections
- Management of the Wear and Service Lives of Tools
- Latest Examples of Using Microscopes to Streamline Measurement and Inspection of Tool Wear
- Fully focused observation and measurement of tools and products
- Observation and measurement unaffected by glossy surfaces
- Observation and 2D/3D measurements of wear and chipping with a single unit
- Observation and measurement of a diamond tool (PCD tool)
- Tool service life management through long-term observation
- Latest Solutions for the Measurement and Inspection of Cutting Tools
New Materials and the Evolution of Cutting Tools
Along with research and development for technologies to reduce weight and improve safety and performance and the practical use of such technologies, the need to cut difficult-to-cut materials such as titanium alloys and CFRP* with high accuracy has been growing rapidly, particularly in the automotive and aerospace industries. In addition to cutting of difficult-to-cut materials, processes that put a great load on tools and still require high reliability have been increasing. Examples of such processes include high-speed cutting to improve manufacturing efficiency and unmanned continuous cutting carried out over long periods of time. In the semiconductor industry, precision cutting technologies at the level of a few micrometres have also emerged along with the necessity for micro processing.
To meet these requirements, throw-away tools having replaceable blades have been developed for tool bits, drills, and end mills. For throw-away tools, tips made of carbide alloys*, PCD*, or CBN* can be mounted on the blades in order to process difficult-to-cut materials. These types of tools are used in a wide variety of fields because it is only necessary to replace the tip when a blade wears out, thereby reducing maintenance time and cost.
CFRP: An abbreviation of carbon fibre reinforced plastics. It is a composite material of carbon fibre and resin. This material features lower density, lighter weight, and higher strength than iron and aluminium. Unlike metals, CFRP has high elasticity and strength in the fibre direction, which enables strength design based on the ratio in the fibre direction.
Carbide alloy (WC-Co alloy): Generally called hard metal. It is a composite material in which carbides of IVa, Va, and VIa group metals in the periodic table are sintered with iron-based metals such as Fe, Co, and Ni. It features excellent mechanical properties such as low- and high-temperature hardness (HRA of 80 to 94), strength (transverse rupture strength: approximately 2 GPa or more), and Young’s modulus (approximately 3 times that of iron).
PCD: An abbreviation of polycrystalline diamond. It is an artificial mineral produced by sintering diamond microcrystals together with metal and ceramic powders at high temperature and pressure. While natural diamonds are monocrystalline, diamonds contained in PCD are polycrystalline and have excellent thermal conductivity and hardness.
CBN: An abbreviation of cubic boron nitride. It is a compound that consists of boron and nitrogen and does not exist in nature. It is the hardest material next to diamond. As for the heat resistance temperature, PCD starts to oxidise at about 700°C while CBN starts to oxidise at about 1300°C, which means that CBN is more suitable for processing under high temperatures.
Importance of Tool Wear Inspections
Worn or chipped tool blades not only affect the accuracy and speed of processing but also cause deformation and breakage of workpieces due to increased blade temperatures. Worn or chipped tool blades also lead to processing machine failures. Hence, the observation of blades to understand their states is directly related to the performance of the cutting process.
For example, throw-away tips—the blades of PCD and CBN tools, which excel at processing difficult-to-cut materials—have a rake surface for discharging chips and a flank surface for preventing the tip from coming into contact with the cutting surface, and the accuracy of the angles of these surfaces directly influences the processing accuracy. If you continue to use a tip that has crater wear or flank wear, the cutting accuracy decreases, leading to defective products.
Hence, regular inspection and optimal management of tool wear make it possible to reduce the loss of materials and the predictive maintenance of cutting tools. Such reductions greatly contribute to reduced costs through improved yield rate and to increased productivity through stable operation of cutting tools.
Management of the Wear and Service Lives of Tools
The service lives of tools vary depending on the cutting conditions such as the material of workpieces, the processing method, the processing speed, and the rotation speed. For example, setting a higher rotation speed to increase the feed amount of the tool bit increases not only the processing speed but also the load on the blade, leading to larger wear. Conversely, setting a lower rotation speed to decrease the feed amount of the tool bit increases the service life of the blade but slows the processing speed.
Cutting must be carried out under optimal cutting conditions that balance the processing speed and the blade service life. Observation and measurement of the wear status of tools using microscopes to derive optimal cutting conditions can be said to be one of the effective means to increase the service lives of tools and improve the yield rate and the production efficiency.
Latest Examples of Using Microscopes to Streamline Measurement and Inspection of Tool Wear
You can control the accuracy more precisely by measuring the 2D and 3D shapes of tools and quantifying wear through radius measurement.
Fully focused observation and measurement of tools and products
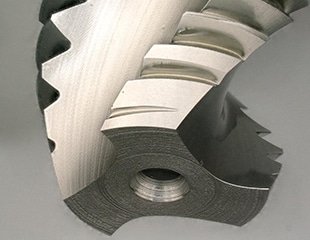
Tool blades have deep, three-dimensional shapes. With these shapes, you can check for any wear and defects on the blade and the status of the processing surface through observation and measurement from the nearest to the furthest sections. During this check, if only a part of the target is brought into focus, you need to readjust the focus for each observation position, which is time consuming.
The VHX Series 4K Digital Microscope is equipped with a real-time depth composition function that immediately composes multiple focusing positions to enable you to view even a target having uneven surfaces fully in focus. Furthermore, the built-in eucentric mechanism enables observation from all directions, without moving the centre axis, thereby allowing you to view the same section from the same position even for different samples. This not only reduces the time required for measurement but also enables easy sample comparison.
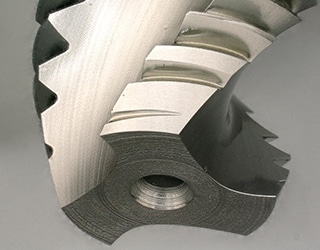
Left: normal, right: real-time depth composition
Observation and measurement unaffected by glossy surfaces
Tools are made of polished metals and the surfaces of their cutting tips are even glossier. Such surfaces cause strong reflected light, which generates glare that hinders observation and measurement.
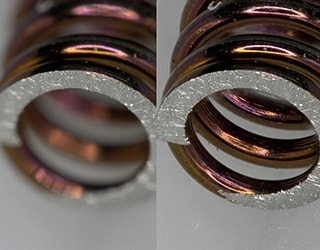
As light reflection countermeasures, the VHX Series 4K Digital Microscope is equipped with a glare removal function, a ring-reflection removal function, and an HDR function that enables imaging with enhancement on surface textures.
The ring-reflection removal function removes ring-shaped reflections on the target surface. Capturing several images with different light-source directions prevents image overexposure.
Also, the HDR (High Dynamic Range) function captures multiple images at varying shutter speeds to obtain an image with high colour gradation. This enables observation at previously unattainable levels of accuracy and contrast.
Clear imaging with reduced reflected light through these functions makes observation and measurement of metal surfaces dramatically easy.
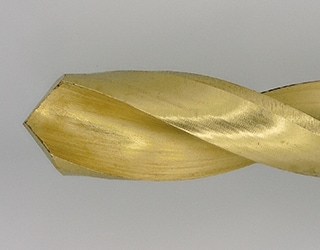
Enable imaging without glare
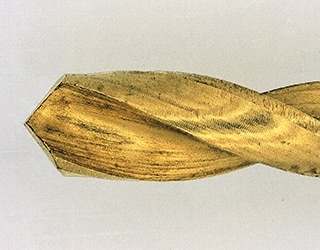
with enhanced metal surface textures
Observation and 2D/3D measurements of wear and chipping with a single unit
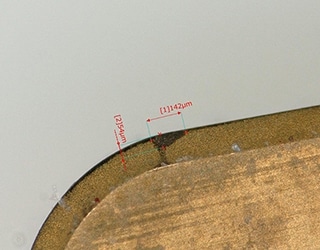
End mills and drill tips have deep shapes and their chipping needs to be measured not only in 2D but also in 3D. In addition, wear and chipping of throw-away tips need to be measured using 3D images.
As well as 2D measurement, the VHX Series 4K Digital Microscope also supports 3D measurement. Measurement in 3D enables observation with accurate 3D images, making it possible to obtain more reliable measurement results. The VHX Series is also equipped with the Auto Adjust function, which enables depth composition even when imaging at an angle. The edge displacement and vibration that can occur during image capture are automatically corrected and a comprehensive, fully focused image is constructed. In addition, the composition can include images captured from an angle.
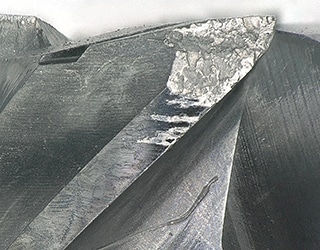
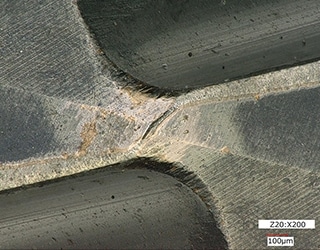
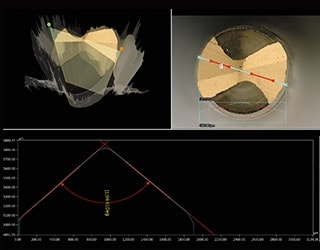
profile measurements of a drill tip
Observation and measurement of a diamond tool (PCD tool)
Diamond tools (PCD tools) are suited to processing and mirror-finishing of carbide alloys and processing of fibre reinforced plastics (FRPs) and carbon fibre reinforced plastics (CFRPs). They also feature high wear resistance and long service life compared to conventional carbide alloy tools. On the other hand, if the blade temperature reaches about 700°C, diamond carbon atoms are absorbed (oxidised) by iron, causing severe wear on the PCD.
You can perform profile measurement by using the 3D composition function of the VHX Series 4K Digital Microscope. This function enables you to understand the surface shape of a PCD tool and to measure not only chipping but also wear in units of micrometres.
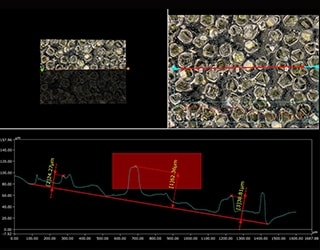
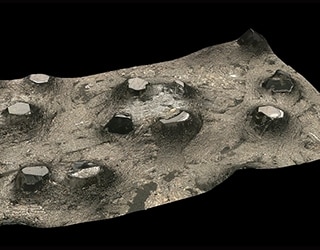
Tool service life management through long-term observation
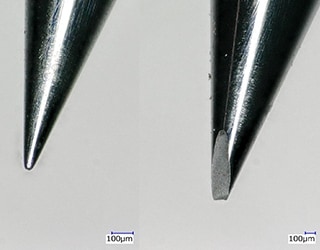
Service life management of tools is indispensable for stable manufacturing. In some cases, it is also necessary to review the cutting conditions. Tips of cutting tools need to be managed with accuracy in units of micrometres, and it is also important to distinguish between wear and adhered chips or foreign particles.
The VHX Series 4K Digital Microscope offers magnifications from 0.1x to 6000x. With the VHX Series, minute cracks and defects can be observed. In addition to these high magnifications, the VHX Series enables 4K high-definition imaging. This imaging function enables types of distinction that have conventionally been impossible, such as distinction between wear and adhered foreign particles.
Through long-term observation of the state of tool tips on the basis of this captured observation data, you can understand the progress of wear and the pattern of problems such as cracking. As a result, you can extend the tool service life by deriving optimal cutting conditions from the problem pattern and prevent defective products from being manufactured.
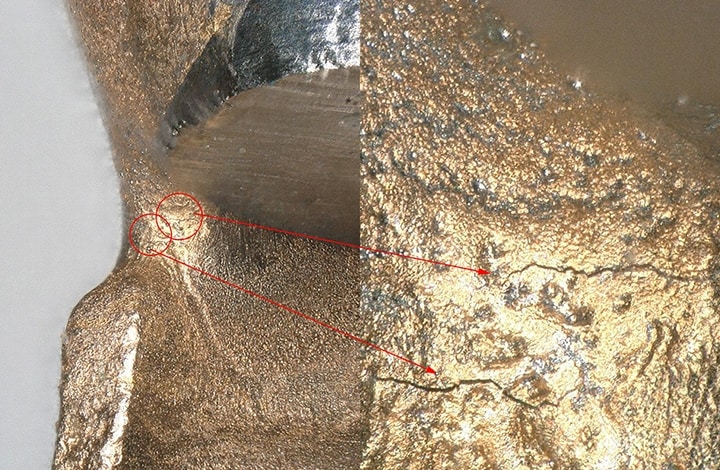
- Left: low magnification
- Right: high magnification
Latest Solutions for the Measurement and Inspection of Cutting Tools
The VHX Series is a powerful tool that solves problems in measurement and inspection and improves work efficiency. It does so by way of its clarity that can be achieved only with 4K high-resolution images, acquisition of high-accuracy numeric data through precise measurement, and data saving and utilisation.
The VHX Series is equipped with functions that strongly support tool observation, including a real-time depth composition function that can bring any area, from close up to far away, into full focus even for deep targets; a eucentric mechanism that keeps the target centred in the field of view, even if the stage is tilted or rotated; and a function that reduces the glare from reflected light that hinders observation. In addition, many other functions are also provided to meet on-site requirements for speed and accuracy such as the Optical Shadow Effect Mode and multi-lighting functions that help express the fine details of uneven surfaces clearly and automatic reproduction of various settings by selecting saved data.
For details on the VHX Series, click the button shown below to download the catalogue. For inquiries, click the other button shown below to contact KEYENCE.


