Measurement and Inspection of Paint Defects and Thickness and of Dispersion of Pigment in Paint
The quality that paints and paintwork require has changed over time, from aesthetics and durability to environmental and economic design.
Paints and paintwork come in a diverse variety for different fields such as construction, automotive, and other industrial use. For example, automobile shell paintwork requires the highest level of quality with respect to a variety of characteristics, including aesthetics, weather resistance, and anti-fading.
This section uses examples and clear images to introduce the basic knowledge of paint, paintwork, and coating, observation and measurement using our latest 4K Digital Microscope, and solutions to problems.
- Paint Materials
- Paintwork Techniques
- Coating Defects and Solutions
- Inspection of Paint Thickness
- Latest Examples of Paintwork and Coating Measurement and Observation
- Common Practices for Paintwork and Coating Measurement and Analysis
Paint Materials
Paint is a chemical product composed of many raw materials. The properties of the paint are determined by the binder, the film-forming component of the paint, while the pigment prevents rust and gives the paint its colour.
The binder gives the paint its film-forming characteristic (the drying characteristic), physical functions (such as the resilience and adhesion of the film), and chemical functions (such as the durability and chemical resistance of the film). The main substance of the binder is synthetic resin. Paint with the binder made water-soluble by resin or dispersed with water is called water-based paint. Paint that is in powder form and made fluid by air is called powder paint.
Pigments are the fine, lightfast colouring particles that do not dissolve in water or other solvents. Pigments can be divided into three classes: coloured pigments, rust-inhibitive pigments, and extender pigments. Coloured pigments provide the paint with its colour, with some examples being titanium white, carbon black, yellow ocher, carbon blue, cyanine green, and quinacridone red. Rust-inhibitive pigments include aluminium phosphate, zinc molybdate, and zinc dust. Extender pigments determine the film properties. Examples include delustring pigments that control the gloss of the dried paint, functional pigments such as aluminium powder and fluorescent or phosphorescent pigments, and special pigments such as infrared reflective agents and ferrite radio-wave absorbents.
Paintwork Techniques
Paintwork forms a film with paint. The thickness of the paint created by the paintwork is generally anywhere from a few to several hundred micrometres. As the paint coating can have functionality, paintwork is a process that can significantly affect cost efficiency.
Paintwork is a three-step process: pretreatment, application, and drying. For multi-layer paintwork, this process is repeated.*
The material’s surface is cleaned as pretreatment. Broadly classified, wet and dry methods are used: typically wet coating and sandblasting are used, respectively.
Paint can be applied in liquid form or in gaseous form by spraying. To apply liquid paint, you can use a brush, a curtain flow coater where paint is applied by passing the workpiece under a waterfall of paint coming out of overhead slits, or a roll coater that uses a rubber application roll to transfer the paint onto the workpiece. Spray painting can be done by using a compressed air sprayer, by electrostatic spray painting where a negative charge is applied to the paint while the workpiece is positively charged, or by powder coating where powder paint is electrostatically charged for application.
Pretreatment may be omitted for middle coating and top coating.
Coating Defects and Solutions
Paint coats can sustain a defect if there are problems in the pretreatment surface condition, weather condition at the time of painting, the paint itself, or the application method. Studying the defect to identify the cause is essential for selecting a suitable paint, improving the application method, and taking other precautions to prevent the recurrence of the same defect.
Here, we have picked up some typical paint defects that you may encounter and we have explained the possible causes and how to prevent the defects.
Pimples
Pimples are typically caused by the adhering of foreign particles in the solidifying paint. Foreign particles can be caused by people or machines stirring up dirt or airborne particles adhering to the workpiece during the masking or polishing process. Resin products may pick up electrostatic charge when being removed from their moulds after forming. Airborne foreign particles are then electrostatically attracted to these moulds and adhere to the product.
Cleaning around the painting facilities and installing covers on conveyors are effective measures to prevent the adhesion of airborne foreign particles. Static eliminators can also be useful for eliminating electrostatic foreign particle adhesion. If paint solidifies, it requires a change in the diluting solvent and/or revision of the agitation cycle. Filtering the paint is another way to effectively prevent solidification.
- Phenomenon:
- There are pimples on the painted surface.
- Possible causes:
- Foreign particles have adhered to the painted surface.
Pieces of solidified paint or foreign particles exist in the paint.
Airborne foreign particles have adhered to the painted surface before it dried.
- Action:
- Clean the material’s surface during pretreatment.
Filter the paint to remove foreign particles.
Implement anti-dust measures.
Cracking
Cracking has a number of different potential causes depending on the material of the paint and how the workpiece is painted.
For example, cracks may occur in multi-layer coating if the conformity between the undercoat and overcoat layers is poor or if the undercoat layer was not dried sufficiently. In such cases, the paint may need to be changed or the drying time for the undercoat layer may need to be extended.
As cracking can occur for a number of reasons, including ageing, it is important to carefully study the condition of the paint coat when identifying the cause.
- Phenomenon:
- There is a crack in the paint coat.
- Possible causes:
- The surface was cracked.
The coating was too thick.
The curing agent mixture was inappropriate (in case of binary paints).
The selection of thinner was inappropriate (if thinner was used).
- Action:
- Eliminate cracks on the surface of the workpiece during pretreatment.
Avoid thick applications that can cause surface drying.*
Stir the paint sufficiently before use.
Use the specified amount of curing agent.
Surface drying: A state where only the surface of the coating has dried and the paint film has yet to harden.
Peeling
Peeling occurs typically when the surface treatment was insufficient or when the paint does not conform with the substrate or the undercoat does not conform with the overcoat.
Remove all rust and old paint from the surface of the workpiece using a disk grinder (sander), and then wipe all foreign particles and grease off the surface before applying paint. Peeling caused by a non-conformity between the paint and substrate or the undercoat and overcoat is called “inter-layer peeling,” which requires a change in paint combinations and/or a different application method.
These tasks are pretreatments to prevent peeling. The requirement of these tasks shows how important pretreatment is for a flawless paint coating.
- Phenomenon:
- The coating loses adhesion and peels off.
- Possible causes:
- Surface pretreatment such as rust removal was insufficient.
Sanding or cleaning of the surface was insufficient.
Inter-layer adhesion between the undercoat and overcoat was insufficient.
- Action:
- Remove all rust, grease, dirt, and dust from the surface.
Pretreat the surface according to the material.
When painting on a surface with an old coating, remove the old coating completely before application.
Adjust the paint formula appropriately.
Use the specified coating thickness for application.
Inspection of Paint Thickness
Measuring the paint thickness is one way to verify that the coating has been formed according to the design.
Coating is designed to block moisture and oxygen from entering inside in order to prevent the substrate from corroding. For that reason, the thickness of the coating has a significant effect on its functionality. This does not mean that thicker is better—the paint thickness must be adequate in order for the coating to provide its full functionality.
Paint thickness is measured using a coating thickness measurement system. There are non-destructive types of coating thickness measurement systems that use magnetic adhesion and flux variation for measurement, and other types that use infrared and ultrasonic methods.
- Electromagnetic coating thickness gauge:
- Coating thickness can be measured by touching the surface with a probe embedded with a permanent magnet. The density of the generated magnetic flex changes according to the strength of the magnet’s pull force. This gauge uses the changes in current passing through the electromagnet to measure paint thickness. It can measure the thickness of the coating or lining (non-magnetic metal layer, inorganic layer, or organic layer) on a magnetic metal substrate. The measurement principle involves the proportionality of the pull force of the magnet embedded at the tip of the probe to the distance to the base. However, the electromagnetic coating thickness gauge cannot accurately measure the thickness of a paint coat that is magnetically charged.
- Eddy current coating thickness gauge:
- Coating thickness can be measured by the loops of electrical current (eddy current) generated by an electrical current passing through an iron-core coil (probe). The measurement principle involves the proportionality of the value of the eddy current generated on the metal surface to the distance. There are two types of eddy current coating thickness gauges: the contact type, which measures coating thickness by the amplitude of eddy currents, and the non-contact type, which measures coating thickness by the phase difference in eddy currents. This gauge can be used for conductive non-magnetic metal substrates (such as aluminium, copper, and austenite stainless steel) with a coating made of plastic, resin, rubber, or other insulating material.
- Infrared coating thickness gauge:
- Paint thickness can be measured using the spectrum obtained by shining infrared light on the coating and dispersing the transmitted light or the reflected light. When infrared light is shined on the coating, a specific light wavelength absorption occurs according to the material and thickness of the coating. The measurement target’s paint thickness can be calculated based on the relationship between the absorption rate and thickness of the material used for the coating.
- Ultrasonic coating thickness gauge:
- When the probe touches the surface of the coating, the sensor transmits an ultrasonic wave toward the base where this wave is reflected back to the surface. The time it takes for the ultrasonic wave to be reflected back is used to measure the coating thickness. The coating thickness measured by an ultrasonic coating thickness gauge is calculated as follows:

D: Paint thickness
C: Speed of sound in the coating* (m/s)
t: Measured round-trip transit time (s)
* Speed of sound in the coating: Approximate speed value defined for each material. Even if the material is the same, different types have different speeds of sound. For that reason, adjustment (calibration) based on the actual coating is necessary before using an ultrasonic coating thickness gauge.
Latest Examples of Paintwork and Coating Measurement and Observation
KEYENCE’s VHX Series ultra-high-definition 4K Digital Microscope makes it possible to drastically improve the efficiency of various tasks in addition to offering sophisticated observation and evaluation of paint and coating using high-definition images.
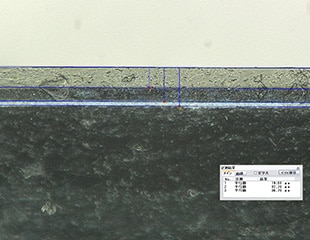
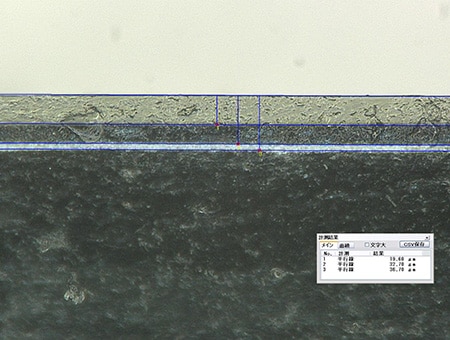
Measurement of multi-layer paint thickness using high-definition optical images
KEYENCE’s latest 4K Digital Microscope measures the paint thickness from optical images. This microscope is not affected by clear layers, which enables sharp focusing. The images are clear and offer a greater volume of information about the coating.
Coating thickness that was previously not measurable due to focus error can now be accurately observed by capturing the actual condition of the coating.
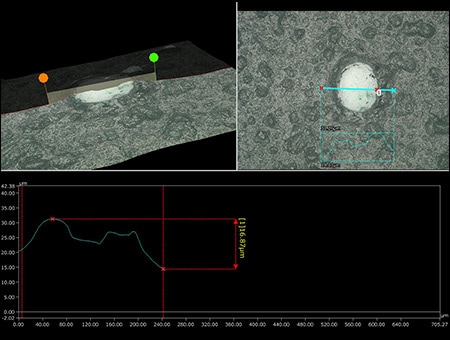
3D observation of clear layers using evolved focus and multi-lighting
Thanks to the drastic improvement in the camera frame rate, once the stage moves to the observation point, the VHX can automatically scan through the focal range of the sample and instantly build a fully focused image.
With a digital microscope, the combination of depth composition and multi-lighting allows users to obtain a fully focused image and to select the desired lighting pattern for that image.
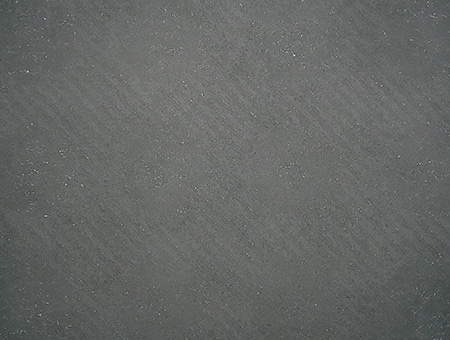
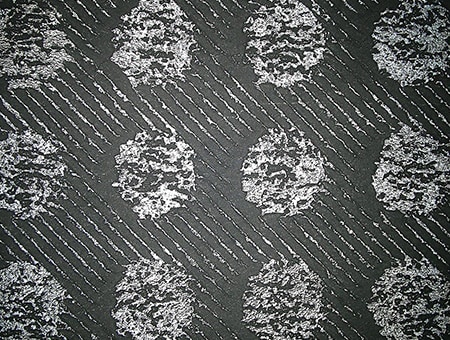
In addition, the Optical Shadow Effect Mode—which uses the high-resolution lens, 4K CMOS, and associated lighting—can overlay colour information on the image to express the uneven surface information and the colour information at the same time. This enables profile measurement of pimples and other paint defects, making the information available for quantification analysis.
Observation by a 4K Digital Microscope that can perform both 2D and 3D measurements with a single unit offers a new approach that meets the universal needs in magnified observation.
High-accuracy measurement of pigment dispersion
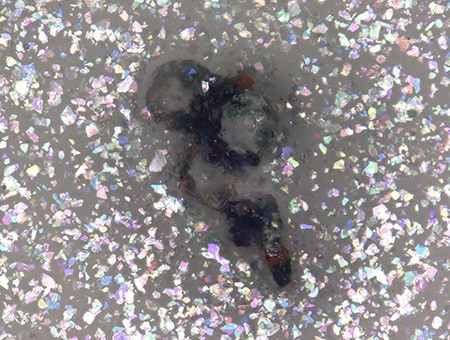
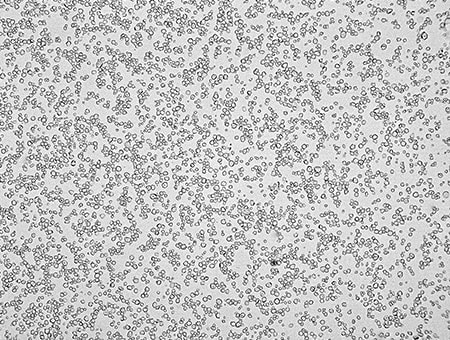
Pigment is one of the significant elements that determine the functionality of paint. The dispersion of pigment can be observed and quantified using the VHX Series. Pigments are the fine, lightfast colouring particles that do not dissolve in water or other solvents. A coating can be given specific functions by adding a suitable pigment to the coating agent and mixing these items together.
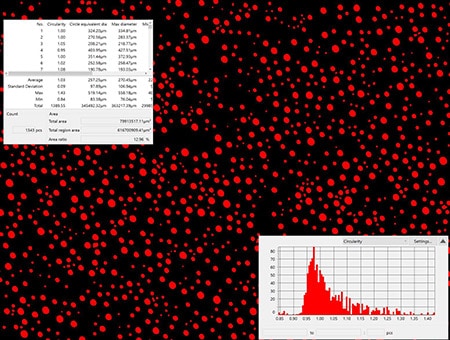
A 4K Digital Microscope can easily count and measure the area of the targets within the specified range. It is also possible to exclude unnecessary targets and to isolate overlapping targets. Measurement results can be output as a histogram.
This series of operations is simple yet achieves reliable, high-accuracy measurements. High-level analysis can be performed without any special knowledge or experience.
Common Practices for Paintwork and Coating Measurement and Analysis
The VHX Series high-definition 4K Digital Microscope offers outstanding efficiency while also making it possible to eliminate human errors and ensure accurate measurement and analysis.
The high-definition 4K images generated by cutting-edge optical image processing and automation techniques allow for clear observation of the coating, pimple, and dispersion details. With no need for complicated operations, even people who are not familiar with the operations of a digital microscope can quickly obtain advanced analysis results.
The captured or measured data can be easily output as a report with a fixed format using the report function. Sharing this data via an intranet server can be useful for not only quality assurance and ensuring conformity with industrial standards but also for identifying the causes of paint defects and for process improvement.
Equipped with many other advanced functions, the VHX Series can be a powerful partner for ensuring the quality and reliability of paintwork and coating.
For details, click the button shown below to download the catalogue. For inquiries, click the other button shown below to contact KEYENCE.


