Increasing the Sophistication of the Observation and Measurement of Tablets and Tableting Machines (Punch and Die)
Tablets are widely used because they hold the active ingredient in a solid, pharmaceutically produced, and fixed shape; are highly portable and can be stored for a long time, and make it easy to recognise the dosage.
This section explains the tableting machines used in the production of tablets from powder, the tableting process that uses the die and punch of these machines, and defects and problems in tablet products and the countermeasures to these issues.
It also introduces the latest observation and measurement examples using our 4K digital microscope that improves the sophistication and efficiency of quality management and quality assurance work for tablets.
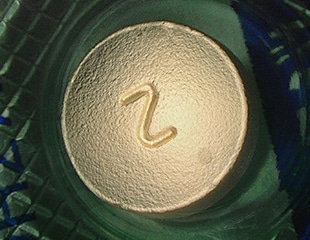
- Tablet Moulding (Tableting) Process with a Tableting Machine
- Tablet Defects (Tableting Malfunctions and Quality-characteristic Errors)
- Observation and Measurement Examples Using a 4K Digital Microscope Effective in the Quality Management and Quality Assurance of Tablets
- Observation of a tablet through a PTP
- Observation of microscopic surface roughness on the cross section of a tablet
- 3D observation of the wear status of a tableting machine’s punch tip
- High-magnification and 3D observation and surface irregularity measurement of the inner surface of a tableting machine’s die
- A 4K Digital Microscope That Improves the Sophistication and Efficiency of Quality Management/Assurance for Tablets
Tablet Moulding (Tableting) Process with a Tableting Machine
Tablets are produced by subjecting ingredients in powder form to compression moulding. They are widely used in medical products designed to be taken internally. If there are no problems with the quality of a tablet, it is just as effective when taken internally as the medicine in its original granular form. The main factor that affects the quality of a tablet during its production is its moulding (tableting) process.
Tableting machines are the devices used in the tableting process. Equipped with moulds, they are a type of press and are also called rotary moulding machines. The added powder ingredient is automatically weighed and inserted into the hole in the die, the fixed mould. Then, the mould known as the punch applies pressure to the powder from above and below, moulding it into a tablet. In mass production of tablets, the filling with powder material, compression with the mould, and discharging of the tablet are performed continuously.
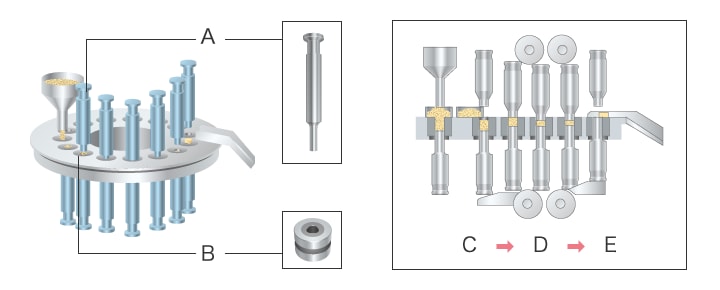
- A
- Punch
- B
- Die
- C
- Filling
- D
- Compression
- E
- Discharging
Tablet Defects (Tableting Malfunctions and Quality-characteristic Errors)
Defects on the outside or inside of a tablet change its storage status and similar factors, which impairs the quality of the product, decreases its reliability and safety, and leads to complaints from customers.
In high-speed and continuous tableting using a tableting machine, the internal structure may not be uniform due to varying internal density caused by mechanical stress and there may be scratches, chips, and other defects on the outside of the tablets due to low external density or due to mould wear. These issues may lead to quality deterioration and to the intended results not being obtained due to changes in characteristics. Read on for an explanation of typical tableting defects and problems and their countermeasures.
Causes and types of tableting malfunctions
These malfunctions refer to defects and problems occurring in tablets produced by the tableting process. The cause is most often the properties of the principal agent in the medicine. For example, if distributed on the surface of the tablet, this agent will come into direct contact with the metal surfaces of the tableting machine’s punch and die, possibly changing the characteristics of this agent. This is a typical tableting malfunction caused by the inclusion of an inappropriate amount of binding agent.
This defect can be classified according to the amount of binding agent as follows.
Insufficient binding agent
This can cause capping (in which the top or bottom surface of the tablet comes off) and lamination (in which the main body of the tablet comes off).
Excessive binding agent
This can cause defects such as sticking (in which a part of the material affixes to the contact surface of the punch and comes off), picking (in which a small amount of material affixes to the contact surface of the punch, causing patchy strips in tablets), and binding (in which vertical scratches occur on the sides of tablets).
Quality-characteristic errors
This is another typical problem in tableting and includes decreased hardness (in which tablets are softer than intended due to uneven distribution) and delayed dissolution (in which the dissolution property decreases, which is the opposite problem of decreased hardness). These quality-characteristic errors cause tablets to dissolve with unintended timing in the gastrointestinal tract after the patient takes the medicine, causing it to be absorbed by this tract too early or too late. Hence, the internal medicine does not have its intended effect.
Importance of tablet defect countermeasures, observation, and measurement
The first countermeasure against these tableting defects and problems when taking medicine is to ensure the hole in the die is filled with the appropriate amount of material. Changes to the characteristics can also be avoided by distributing the binding agent on the surface of the tablet (the die side), preventing the principal agent in the medicine from coming into contact with the die. Sufficient consideration must also be given to the response to water (water molecules) during tablet storage and when taking the medicine, to the effects of various chemical reactions, and to surface coating processing.
As such, tablet quality management and assurance require that the causes of tablet defects and problems be investigated and eliminated through observation of the outer appearance of tablets, which are small and delicate. Therefore, clear magnified observation and evaluation through quantitative measurement of the outer appearance and cross sections of tablets are very important.
Observation and Measurement Examples Using a 4K Digital Microscope Effective in the Quality Management and Quality Assurance of Tablets
Tablets are small and three dimensional, which makes it difficult to bring their entire images into focus during clear magnified observation of their surface and cross section conditions. Also, determining the appropriate lighting conditions for observation of microscopic surface conditions is very difficult and takes a lot of time and effort. Furthermore, tablets formed from powder by compression moulding are delicate, so it is not realistic to expect contact measuring instruments to be able to measure tablets in 3D.
KEYENCE’s VHX Series 4K digital microscope is equipped with an optical system and a 4K CMOS image sensor that combine a large depth of field with high resolution. The design of the observation system eliminates various problems by allowing operators to easily use highly functional lighting and advanced image processing. The advanced observation and highly accurate measurement allow for fast analysis and evaluation of defects with simple operations, greatly improving work efficiency in quality control and assurance of tablets.
Read on for the latest examples of tablet observation and measurement using the VHX Series.
Observation of a tablet through a PTP
The VHX Series 4K digital microscope provides a large depth of field, allowing for observation with clear, 4K images in which the 3D tablet is in focus throughout the entire field of view, even if that tablet is contained in a PTP (press through package).
Furthermore, diffuse reflections of light from the PTP plastic sheet moulded into a convex shape and from the base film can be easily removed with the ring-reflection removal function, allowing for clear observation of microscopic surface irregularities on tablets within packages.
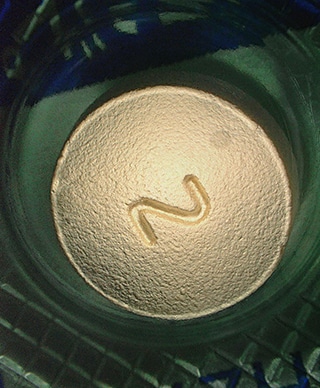
This product provides clear observation of tablet surface conditions in various processes such as tableting, transportation, and packaging, which makes it useful in identifying the process in which tablets were scratched or chipped.

Observation of microscopic surface roughness on the cross section of a tablet
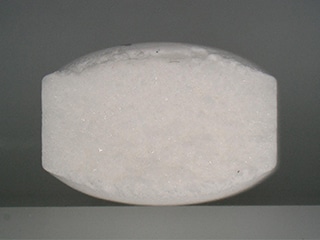
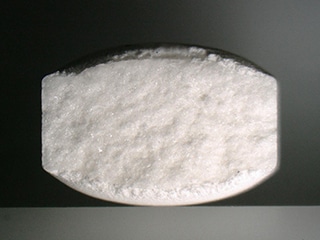
Observation of tablet cross sections is vital in investigating the density of tablets and the distribution of ingredients during tableting. However, most tablets consist of a single light colour, which makes it easy for glare to occur. Therefore, optical microscopes face various time-intensive problems when obtaining contrast from tablet cross sections: it is very difficult to determine lighting conditions and a variety of lighting equipment has to be used.
The VHX Series 4K digital microscope is equipped with a Multi-lighting function that automatically acquires data captured with omnidirectional lighting at the press of a button. The operator just has to select the optimal image from all those that have been acquired, eliminating the time and effort that were conventionally wasted on repeated lighting condition determination. The optimal images for observation of microscopic surface irregularities can now be easily obtained even when observing low-contrast tablet cross sections.
Furthermore, other lighting data is saved even after images are recorded, so observation under different lighting conditions can be performed immediately with no need to prepare the same sample and determine its conditions again.
Additionally, the lighting conditions used when a past observation image was captured can be reproduced just by selecting that image. The result is that it is easy to observe samples under the same conditions even if a different operator observes a different sample of the same type of product.
3D observation of the wear status of a tableting machine’s punch tip
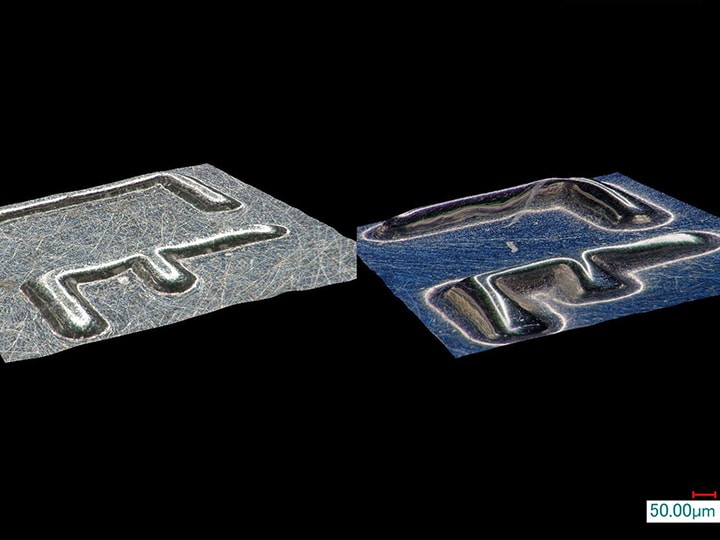
To reduce the occurrences of defective products in the mass production of tablets, it is important to understand the status of tableting machines. Wear on the surface of the punch tip—which acts as a mould and continually contacts the materials, compressing them inside the die—may lead to poor stamping of text information such as the medicine name and dosage, so it is necessary to check the status of punch tips through periodic observation. However, the surfaces of these tips are small, and the surface irregularities used to stamp text have microscopic shapes, so it was difficult to observe these shapes in three dimensions.
The VHX Series 4K digital microscope can capture microscopic shapes and surface conditions in the height direction while changing the focus position, allowing for observation with 3D images. Because it uses 4K, high-resolution images that even capture surface roughness, it enables sub-micrometre, non-contact, high-accuracy 3D measurements.
The 3D-displayed stamping surface of the punch tip can be rotated in any direction for efficient observation of microscopic shape changes and surface conditions. 2D and 3D dimensions and profiles of any part can be measured easily, which makes it possible to find trends in wear by recording tableting counts and measured values.
High-magnification and 3D observation and surface irregularity measurement of the inner surface of a tableting machine’s die
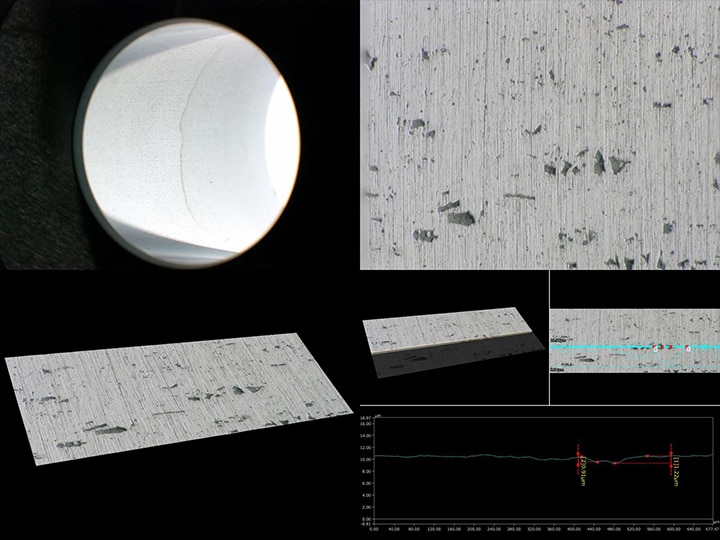
During tableting, the tableting machine’s die moulds the sides of the tablet. Scratches on the die are projected onto the sides of the tablet, so checking the internal surfaces of the die is vital to maintaining quality. However, it is very difficult to observe the surface conditions of deep parts at high magnifications and in a non-destructive manner.
The VHX Series 4K digital microscope is equipped with a Multi-lighting function that automatically acquires image capturing data with omnidirectional lighting at the press of a button. Observation can be performed immediately simply by selecting the optimal image, eliminating the hassle of determining the conditions. This product uses a free-angle observation system with XYZ motorised stage to enable tilted observation with easy field-of-view alignment, rotation, and oblique axis motion. Observation from various angles with high-resolution images is possible even for the inner surfaces of small die holes.
Furthermore, 3D images composed by capturing microscopic surface roughness directly from observation images can be displayed and observed from any angle, allowing not just for 3D measurement but also for profile measurement simply by specifying the desired location with the mouse. The result is that sub-micrometre level measured values can be acquired for the heights and depths of microscopic irregularities in the specified locations on the inner surfaces of dies.
A 4K Digital Microscope That Improves the Sophistication and Efficiency of Quality Management/Assurance for Tablets
The VHX Series 4K digital microscope can easily acquire 4K images for clear observation of tablets and the key parts of tableting machines. Its non-contact 3D display, 3D measurements, and profile measurements allow this one device to strongly support all the work required for quality management and assurance of tablets.
It is also possible to automatically create reports in which observation images and measured values are automatically laid out, greatly reducing the time and effort that is often required for this work.
For additional info or inquiries about the VHX Series, click the buttons below.


