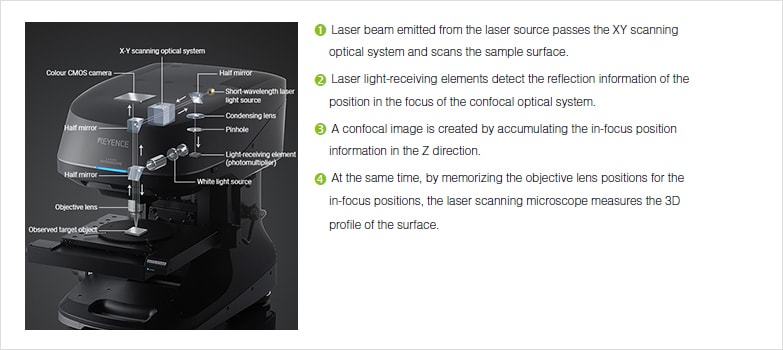
3D laser scanning microscope
A 3D laser scanning microscope is an observation/measuring equipment that enables both the 3D measurement and deep focus depth observation at the same time. It has no restrictions on the size or material of a sample and allows for observation under normal environmental conditions. In addition, the 3D laser scanning microscope features user-friendly operability similar to that of an optical microscope. Samples do not need pretreatment before measurement. Observation can be done in colour, which helps accurate analysis of the conditions of the target object. A 3D laser scanning microscope can also be used for measuring the thickness of films, as well as for observing the surface, inside, and back side of a translucent object.
While the 3D laser scanning microscope is better than a scanning electron microscope or an atomic force microscope in terms of operability, it is inferior in observation magnification and measurement resolution. Bottom parts with high aspect ratio and slopes with large angles cannot be measured or observed, because they do not reflect the laser beam.

| Advantages | Disadvantages |
|---|---|
|
|

