White light interferometer

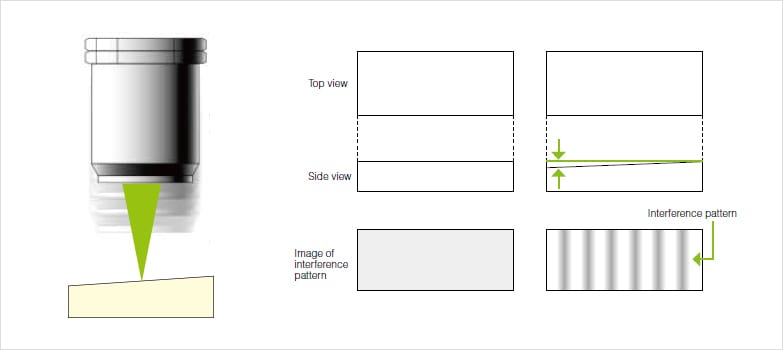
Light interference occurs when there is a difference in distance traveled by the light (light path) from the surface of a target object to a certain point.
The white light interferometer uses this phenomenon to measure the surface roughness of a sample. The figure on the right is a structural diagram of an interferometer. The light emitted from the source (semiconductor laser, etc.) is separated into reference and measurement beams. While the reference beam
is passed to the reference mirror through a beam splitter, the measurement beam is reflected and guided to the sample surface.
The passed beam is reflected by the reference mirror to the CCD image sensor and forms an interference pattern. The other beam is reflected off the sample surface, passes the beam splitter, and forming an image at the CCD image sensor.

The white light interferometer is designed so that the optical path length from the CCD
element to the reference mirror and that from the CCD element to the sample surface are the same. The asperity on the sample surface causes these path lengths to be unequal, which results in forming an interference pattern at the CCD element. The number of lines in the interference pattern is translated to peaks and troughs (heights) on the sample surface.
| Advantages |
Disadvantages |
- - Capable of measuring a wide field of view.
Measurement in sub-nanometre range is possible.
- - Quick measurement
|
- - No or limited angular characteristic
- - Use is limited on certain objects
White light interferometer can only measure when there is good reflection. Therefore, it does not support the measurement of a variety of objects.
Measurement may also not be possible when there is significant difference between the light reflected from the reference mirror and that reflected
from the measurement area. (White light interferometer handles mirrored surfaces well, but cannot measure spiky or bumpy samples or nonreflective
objects.)
- - Requires tilt correction
Prior to measurement, sample tilt correction must be performed using the goniometric stage. Tilted samples can cause closely-spaced interference
patterns, which hinders accurate measurement. Some white light interferometry systems are equipped with a tilt mechanism that automatically
corrects the sample tilt.
- - Low resolution for XY stage measurement
The resolution for XY stage measurements is low due to the low number of sampling data sets (approximately 300,000). Some white light
interferometry systems can scale up to use approximately 980,000 data sets.
- - Sensitive to vibrations
Place of installation is limited due to the equipment’s high sensitivity to vibrations. Shock-absorbing tables are necessary for installation.
|


