What Is Surface Roughness?
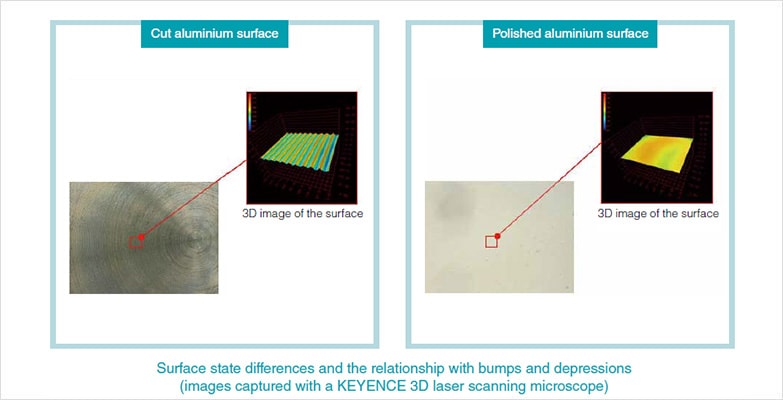
Consider the surfaces of machined parts that you see all around you. These surfaces come in a wide variety from shiny and smooth to rough and matte. These outer appearance differences arise from the different surface roughness of the parts.
If you look at machined parts, you will notice that their surfaces embody a complex shape made of a series of peaks and troughs of varying heights, depths, and spacing.
Surface roughness is defined as the shorter frequency of real surfaces relative to the troughs. Surface roughness is greatly affected by the microscopic asperity of the surface of each part.

Differences in surface roughness obviously lead to visual differences. However, they also have an effect on a variety of other characteristics. Examples include; the amount of wear, the ability to form a seal when a part makes contact with something, and the thickness of the paint needed to coat a part. This is why it is necessary to quantify surface roughness, that is, the microscopic asperity of surfaces. There are countless methods that can be used to quantify microscopic asperity. Some examples include finding the level difference between the highest and lowest points within a 1 mm square area, or finding the difference between the average of 5 high points and the average of 5 low points on a straight line 2 mm in length. However, if standards are determined in this sort of arbitrary fashion, confusion can occur. When a part from company A is assembled together with a part from company B to form a final product, these component parts must have the same surface roughness. If they do not, the ability to form a seal will be decreased. In this situation, it is a major problem if companies A and B manage surface roughness using different standards. The International Organisation for Standardisation regulates standards in order to define surface roughness.
* In this document, surface roughness also refers to quantitative analysis conforming to the ISO 4287:1997 standard.
